
Guides / illustrated walkthrough
Clef-Flash Tutorial: Install and Run Cloudflare's 9B Multimodal Decision Model Locally on Ubuntu
Aleksandar Haber's Clef-Flash video, rebuilt as a step-by-step install guide: apt, a testClef2 workspace with an env1 venv, the six-package pip minimum, the optional causal-conv1d and flash-linear-attention speed-ups, then two verified runs — an Acme invoice judged overdue at 0.9728 and an AI-generated photo of a cracked-screen phone judged cracked at 0.9626 with the packing-paper check at 0.957 yes.
Quick takeaway
This is the from-zero install of Clef-Flash, Cloudflare's 9-billion-parameter multimodal decision model, following robotics professor Aleksandar Haber's video frame by frame — every number below was read off the screen of the recording. Positioning first: Clef is built for structured decision-making rather than free-form chatting. A test means defining a text state, optionally passing a raw image, asking multiple-choice questions, and reading calibrated JSON probabilities for every option. The full install path on Ubuntu: sudo apt update && sudo apt upgrade; mkdir testClef2 && cd testClef2; python3 -m venv env1 && source env1/bin/activate; pip install torch transformers accelerate pillow huggingface_hub torchvision — the minimum set, which the creator says took a while to figure out and totals roughly 2–3 GB. Optionally, pip install causal-conv1d flash-linear-attention speeds up inference; these two are not required, need the NVIDIA CUDA toolkit and GCC because they compile locally on first install, and the on-screen run finished with Successfully installed causal-conv1d-1.7.0 einops-0.8.2 fla-core-0.5.2 flash-linear-attention-0.5.2 ninja-1.13.2. The model itself arrives in Python: path = snapshot_download("Cloudflare/clef-flash"), sys.path.insert(0, path), then from joint_schema_model import load_release_model, systemone — the joint_schema_model module ships inside the repo, which is why the path goes on sys.path. The model card's Usage section visible in the video says the stack was tested with torch 2.11 and transformers 5.10.2 on a single H200, and that image and video inputs also need pillow. Demo one, text only: a record whose state is an invoice (vendor Acme, total 1250.0, currency USD, status overdue) with a choice question "What is the invoice status?" over paid/overdue/draft plus a noul (yes/no) question "Is the total above 1000 USD?" returns status {'draft': 0.00969, 'overdue': 0.97277, 'paid': 0.01754} and large {'true': 0.97344} — correct on both, and the verdict lands right after the weights load (760/760, about two seconds once cached). Demo two, multimodal: a photo of a smartphone with a cracked screen packed in a box with crumpled paper (the creator generated it with an AI image engine; any photo works) goes in as images: [Image.open("test_image.jpeg")] with the state "Analyze the condition of the smartphone and its packaging.", a device_damage choice (none / scratched / cracked), and a has_packing_materials noul. Output: {'choice': 'cracked', 'confidence': 0.9626, 'probabilities': {'none': 0.015, 'scratched': 0.0225, 'cracked': 0.9626}} and has_packing_materials noul 0.957 — the paper is visibly in the box, and the model saw it. Hardware: on the creator's RTX 3090, nvtop showed the python3 test2.py process at 18,666 MiB with total card usage at 20.2 of 24 GiB, 62°C; the code comment itself says the 9B model loads natively in 24 GB VRAM. One API gotcha shown live: the systemone record requires the "model" and "state" keys — leave "model" out and you get ValueError: model and state are required. Honesty boundaries: every probability here is the creator's demo run on his own demo data, recorded once; the like count (358) and library versions are as they were at recording; and the multimodal image input shown here is a Clef capability that this site's Jev coverage has no equivalent for — that difference is real, and so is the warning that a single demo photo proves the plumbing, not benchmark-grade accuracy.
Video source
Aleksandar Haber PhD
Step-by-step walkthrough
- 1
What Clef-Flash is: a 9B decision model, not a chat model
The opening slide sets the boundary before anything is installed: Cloudflare Clef — however you pronounce it — is a powerful multimodal AI designed specifically for structured decision-making rather than free-form chatting. There is no conversation loop to evaluate here: the video promises to run the highly efficient 9-billion-parameter Clef-Flash version entirely locally, on Ubuntu, from an empty machine to calibrated probabilities. That framing matters for expectations. A chat model answers in prose you have to parse; Clef-Flash consumes a typed record and returns numbers you can branch on. This page walks the whole video in order — environment, dependencies, both demo scripts — and every probability quoted was read from the recording's screen, not from the narration.
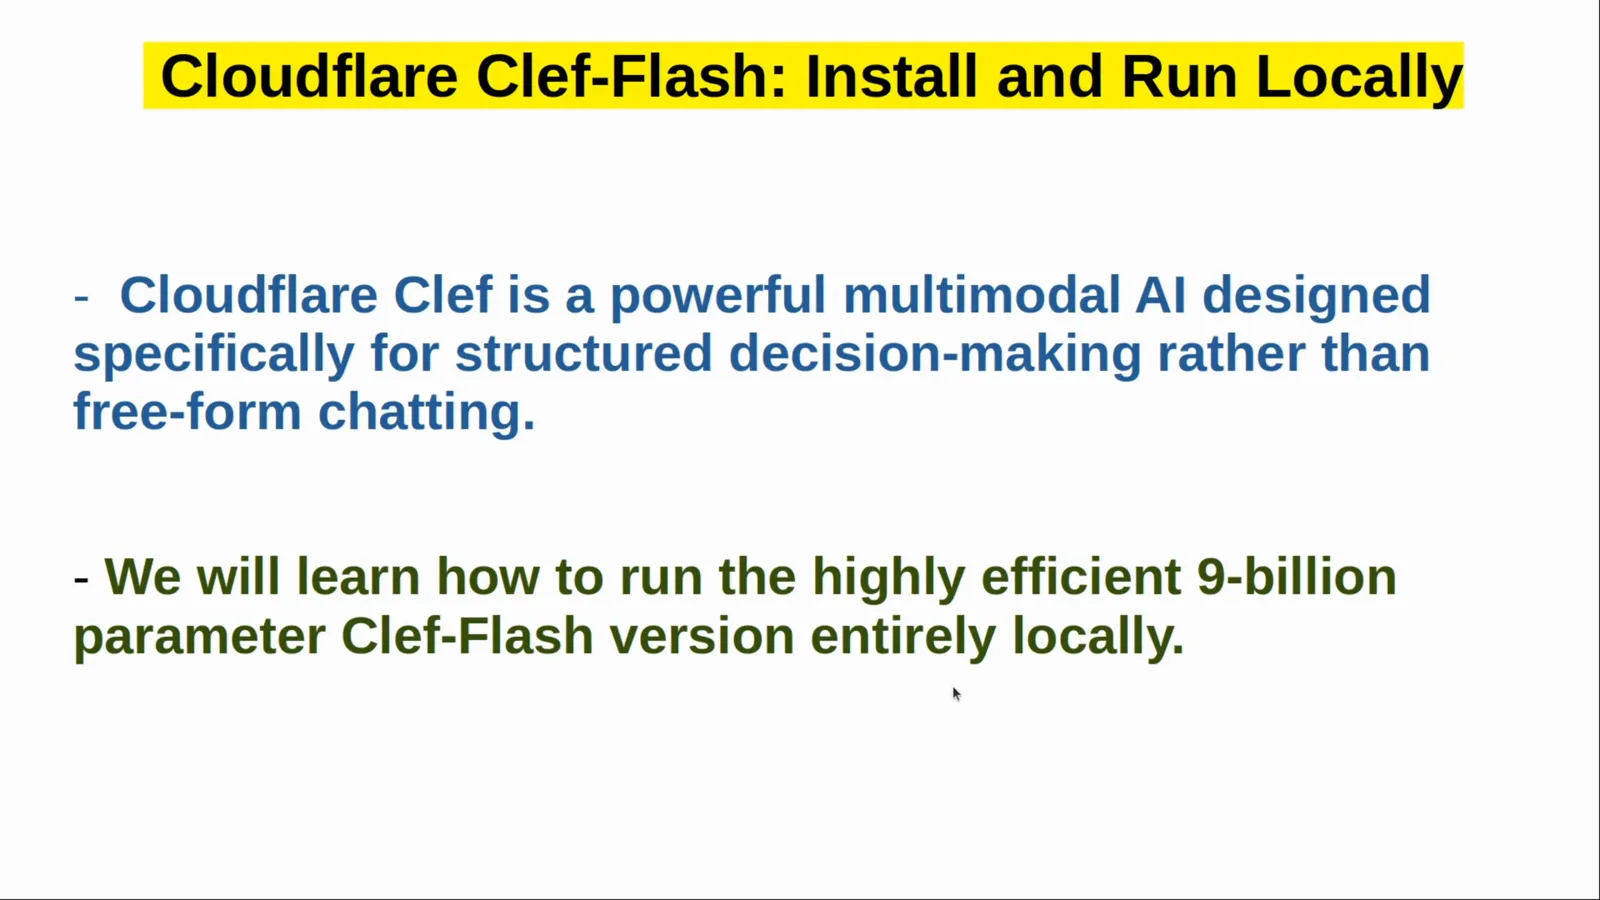
The video's own thesis slide: structured decisions, not chat — and the 9B Clef-Flash, fully local.Watch at 0:05 - 2
How a test works: state, optional image, multiple choice, JSON probabilities
The "Model test and basic idea" slide compresses the whole interface into three moves. First, you define a text state and optionally pass in a raw image — a photo of a delivered package or a receipt are the examples on the card. Second, you ask multiple-choice questions, such as identifying the product type or assessing physical damage. Third, the model processes the visual context and instantly outputs calibrated JSON probabilities for every option. Note the shape of the output: not one winner, but a probability for each option you listed, which is exactly what a downstream rule or state machine needs to set its own thresholds. The rest of the video is two scripts that exercise this loop — one text-only, one with an image — plus the environment that makes them run.
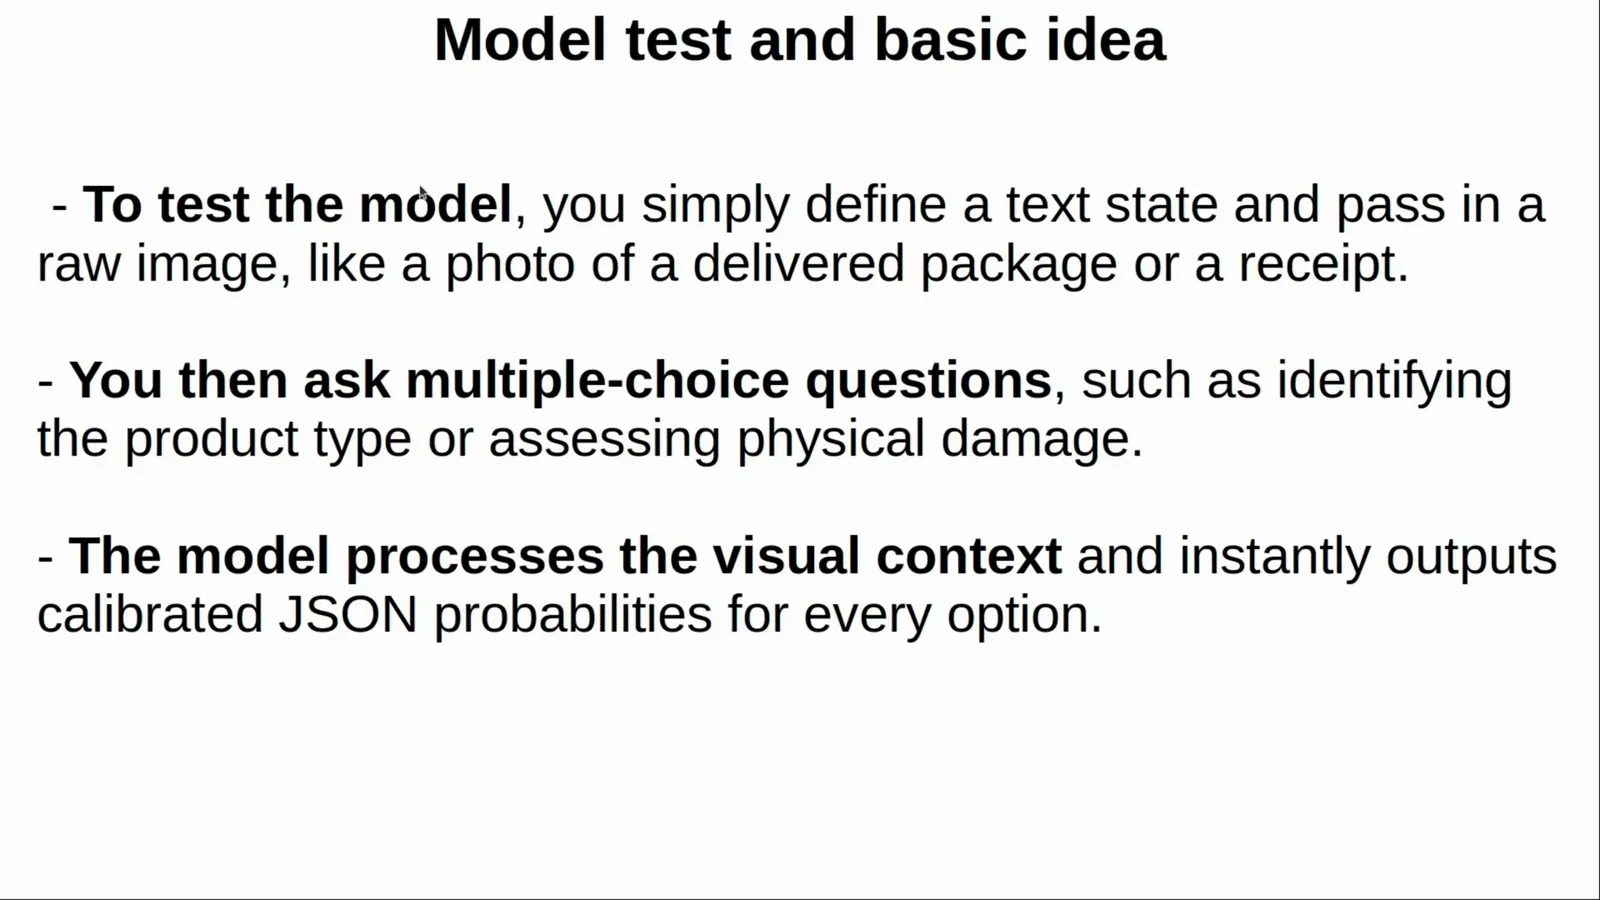
State + optional photo in, a probability for every option out — the entire product surface on one slide.Watch at 0:30 - 3
The multimodal input: a cracked phone in a paper-packed box
Before any install step, the video shows what a multimodal input actually looks like: an image viewer open over the editor, displaying test_image.jpeg — a smartphone with a visibly cracked screen lying inside a cardboard box lined with crumpled brown paper. The creator is upfront about the photo's origin: he asked an AI image engine to generate a phone with a cracked screen inside a box, and says any other photo works just as well. Two details in this frame pay off later: the paper packing is plainly visible (a second question will ask about it), and the crack on the display is exactly the kind of physical damage a warehouse intake check needs to catch. This image-input path — a picture attached to a text state in one record — is also the clearest capability difference from the models this site usually covers: Jev's local stack has no equivalent image input.
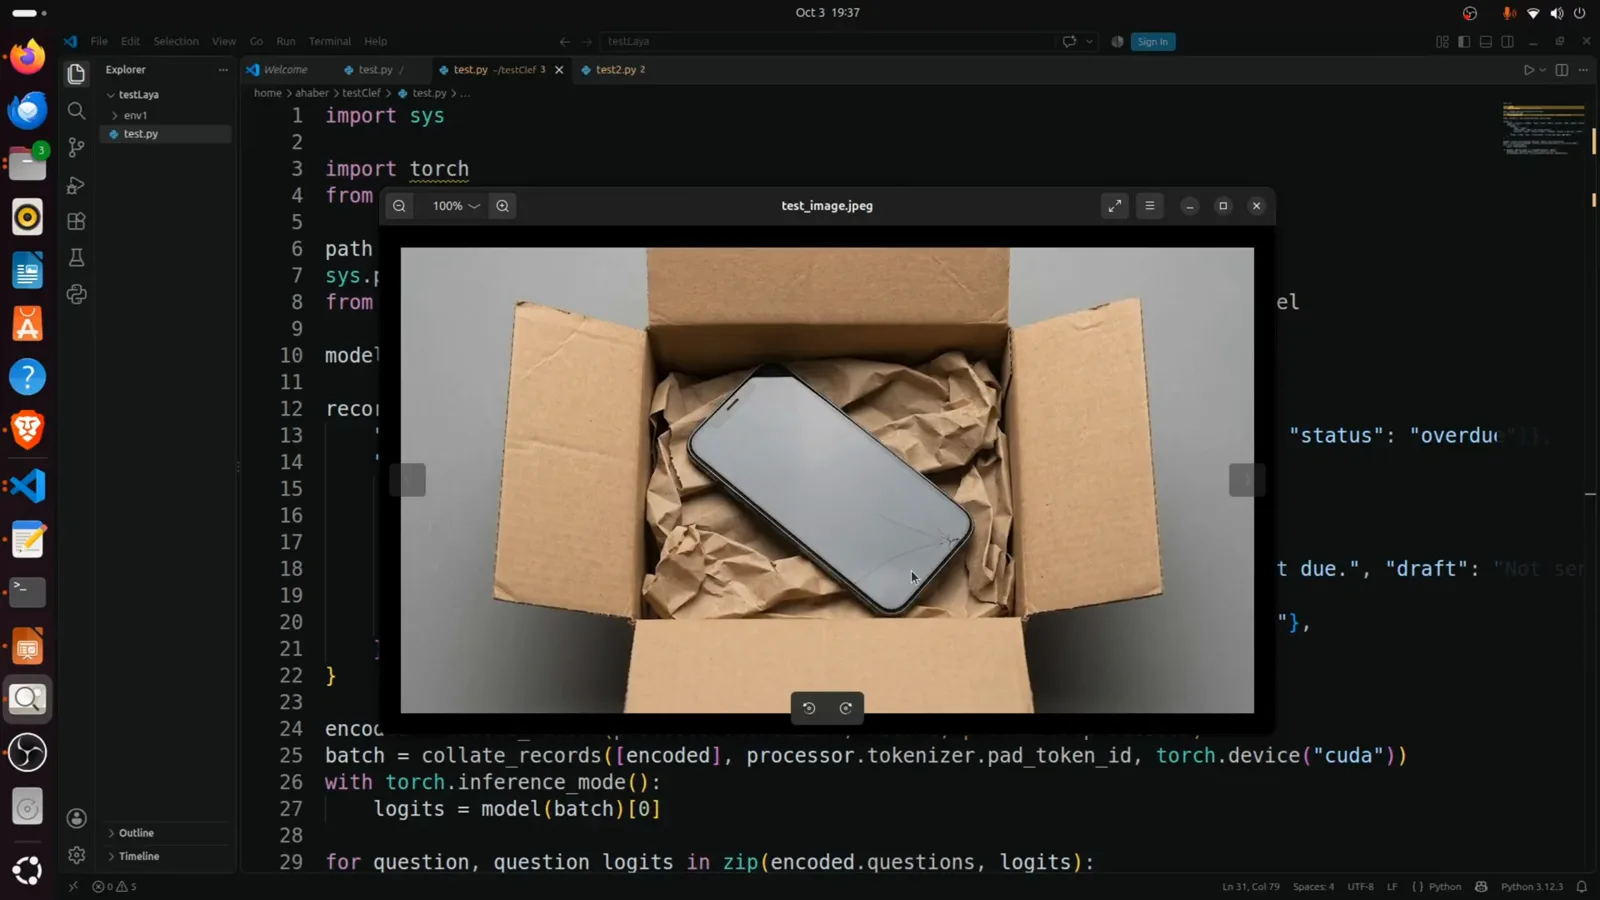
The demo input: AI-generated cracked phone, real crumpled-paper packing — both details become questions.Watch at 1:10 - 4
What it costs on GPU: about 18.7 GB of an RTX 3090
Mid-demo, the video cuts to nvtop, and the card answers the practical question most people actually have. Device 0 is an NVIDIA GeForce RTX 3090 on PCIe Gen 3 x16; during the test2.py run the python3 process holds 18,666 MiB of GPU memory (76% of the card), total usage reads 20.198 of 24.000 GiB, the GPU sits at 1905 MHz and 62°C with the fan at 30%. The comment inside the demo code says the same thing in one line: the 9B model loads natively and fits in 24 GB VRAM on an RTX 3090. So the working minimum for the full-precision model is a 24 GB NVIDIA card; when a run finishes, the memory drops back to idle (~2 GiB in the same nvtop window). The 760/760 weight-loading bar completes in about two seconds once the model is cached — the download is a one-time cost.
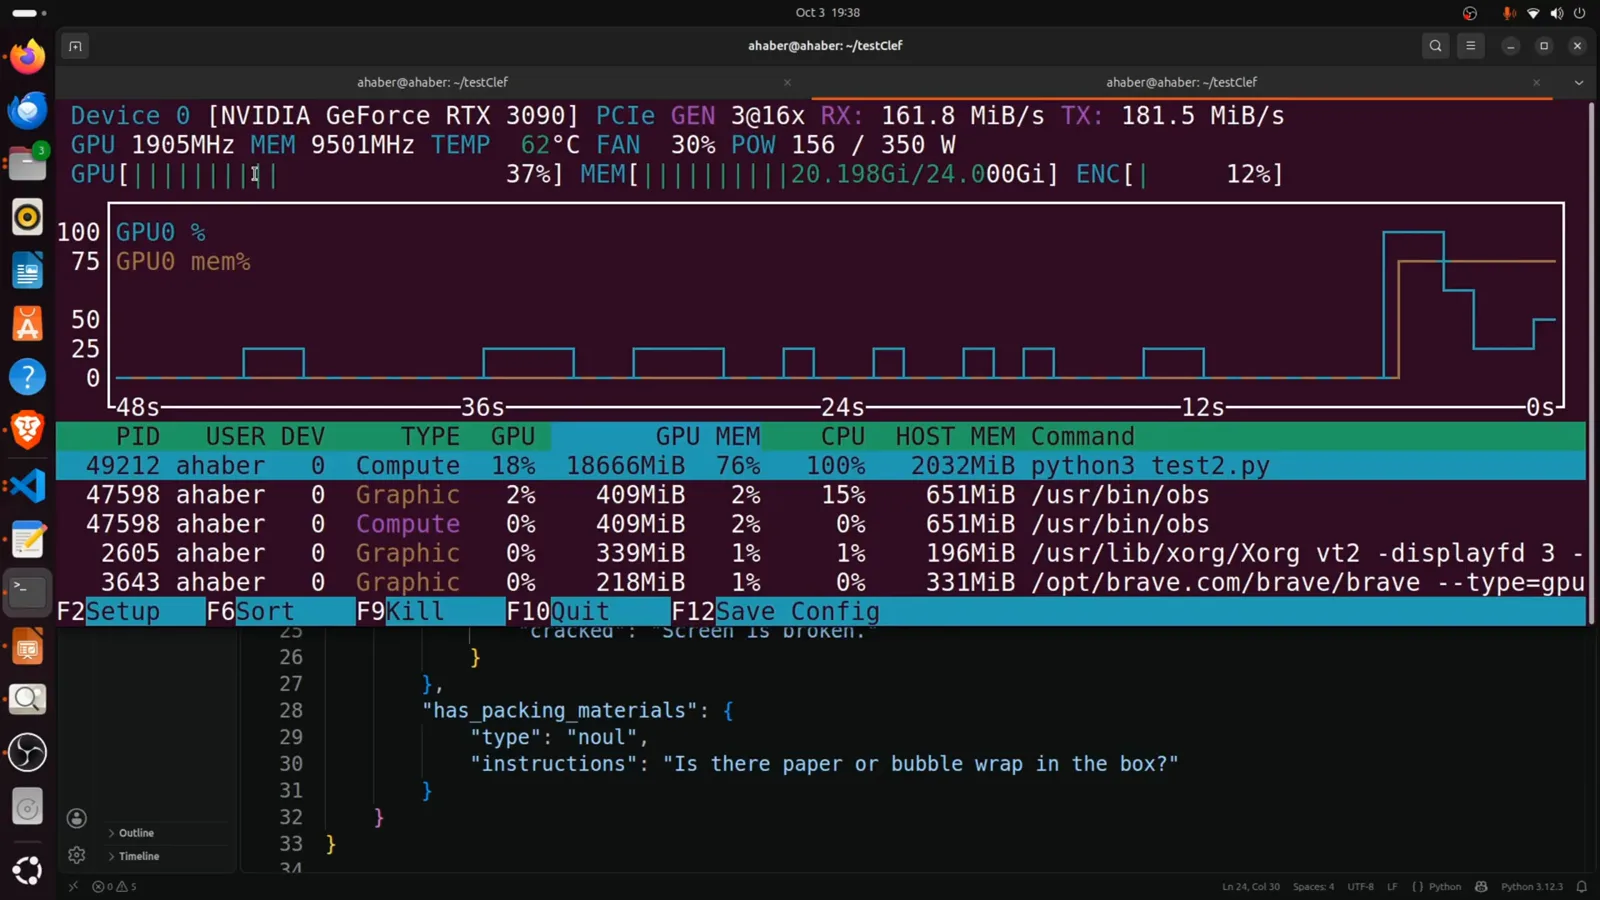
nvtop during a live run: 18.7 GB for the process, 20.2/24 GiB on the card, 62°C — the 24 GB class is the honest bar.Watch at 2:29 - 5
Why a robotics professor cares: confidence scores into a C++ control node
The channel is robotics-first, and its "Application in robotics" slide is the clearest statement of why typed probabilities matter. The state: a robot arm feeds live camera frames and task descriptions into the model. The questions: predefined checks that evaluate object fragility and workspace safety. The outcomes: the model returns numerical confidence scores that a C++ control node or state machine uses to safely execute a grasp or trigger a safety stop. That last line is the whole argument for decision models in automation — a string like "the screen looks broken" cannot gate a motor, but "cracked: 0.96" can sit behind an if-statement with a threshold, and anything below the threshold routes to a human or an emergency stop. The same pattern transfers to any pipeline where software, not a person, acts on the answer.
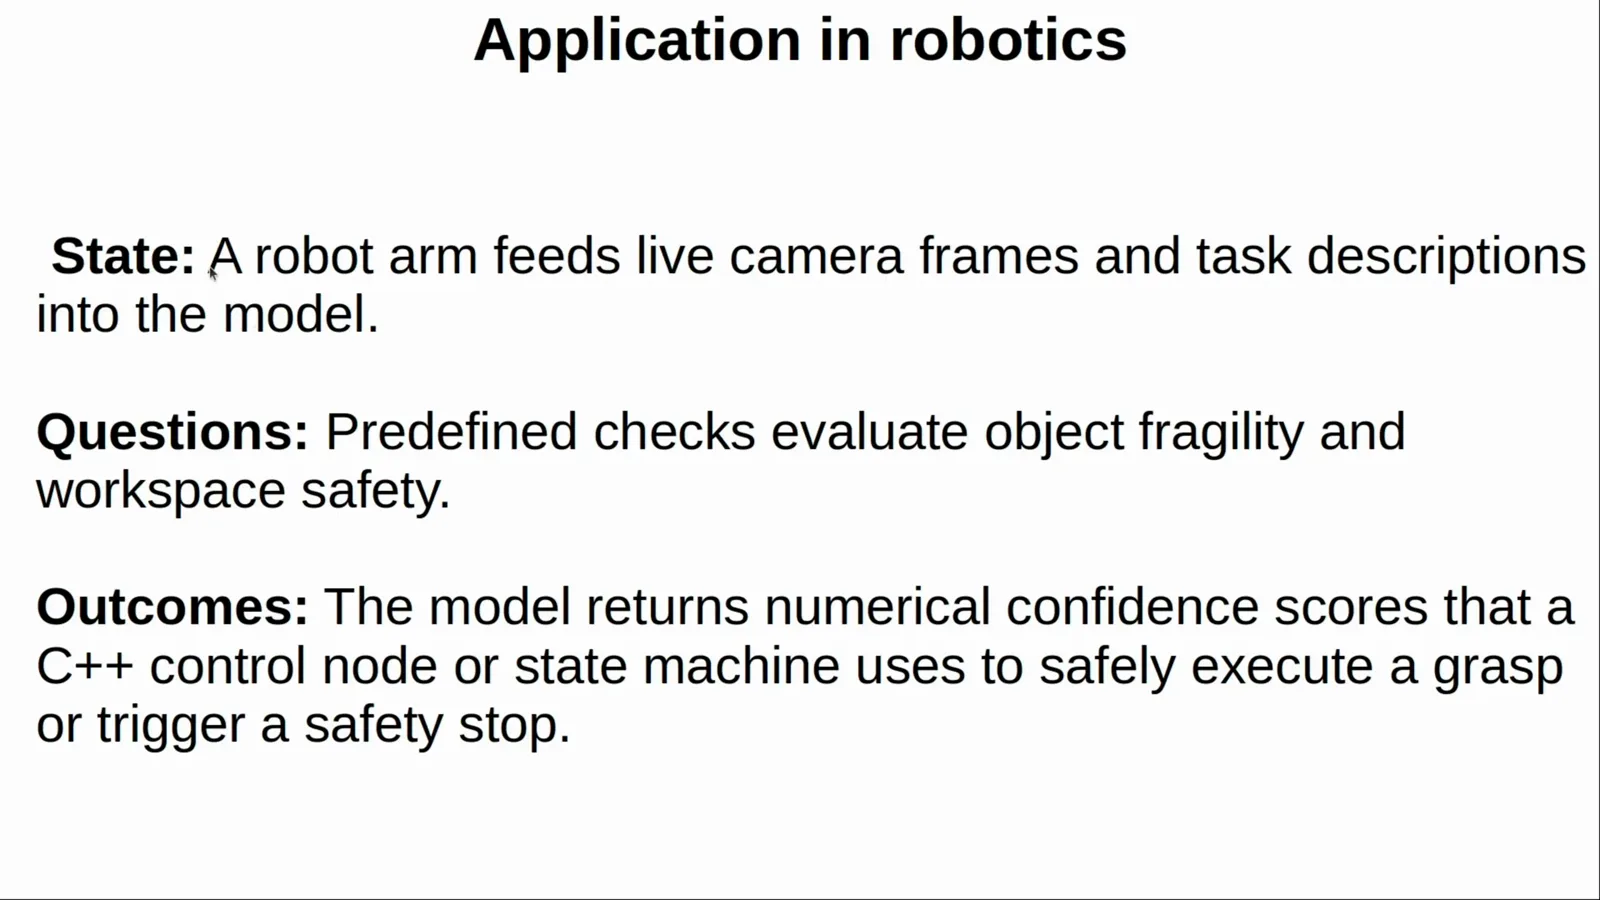
Camera frames in, checks asked, numbers out — and a C++ node turns the numbers into grasp-or-stop.Watch at 3:22 - 6
The model page: Cloudflare/clef-flash on Hugging Face
Everything used in the video comes from one repository: huggingface.co/Cloudflare/clef-flash. The header tags it Image-Text-to-Text with Safetensors weights, lists systemone, multimodal, structured-output, and classification among the tags, sits on a Qwen3.5-tagged backbone, and — the line that matters for a local install — carries an Apache-2.0 license. At recording the page showed 358 likes; treat that and every view count as a snapshot of the recording date, not a live metric. The model card is also where the test code lives: the demos on this page follow the card's own Usage snippet, so the repository is the single source for weights, custom code, and the reference scripts.
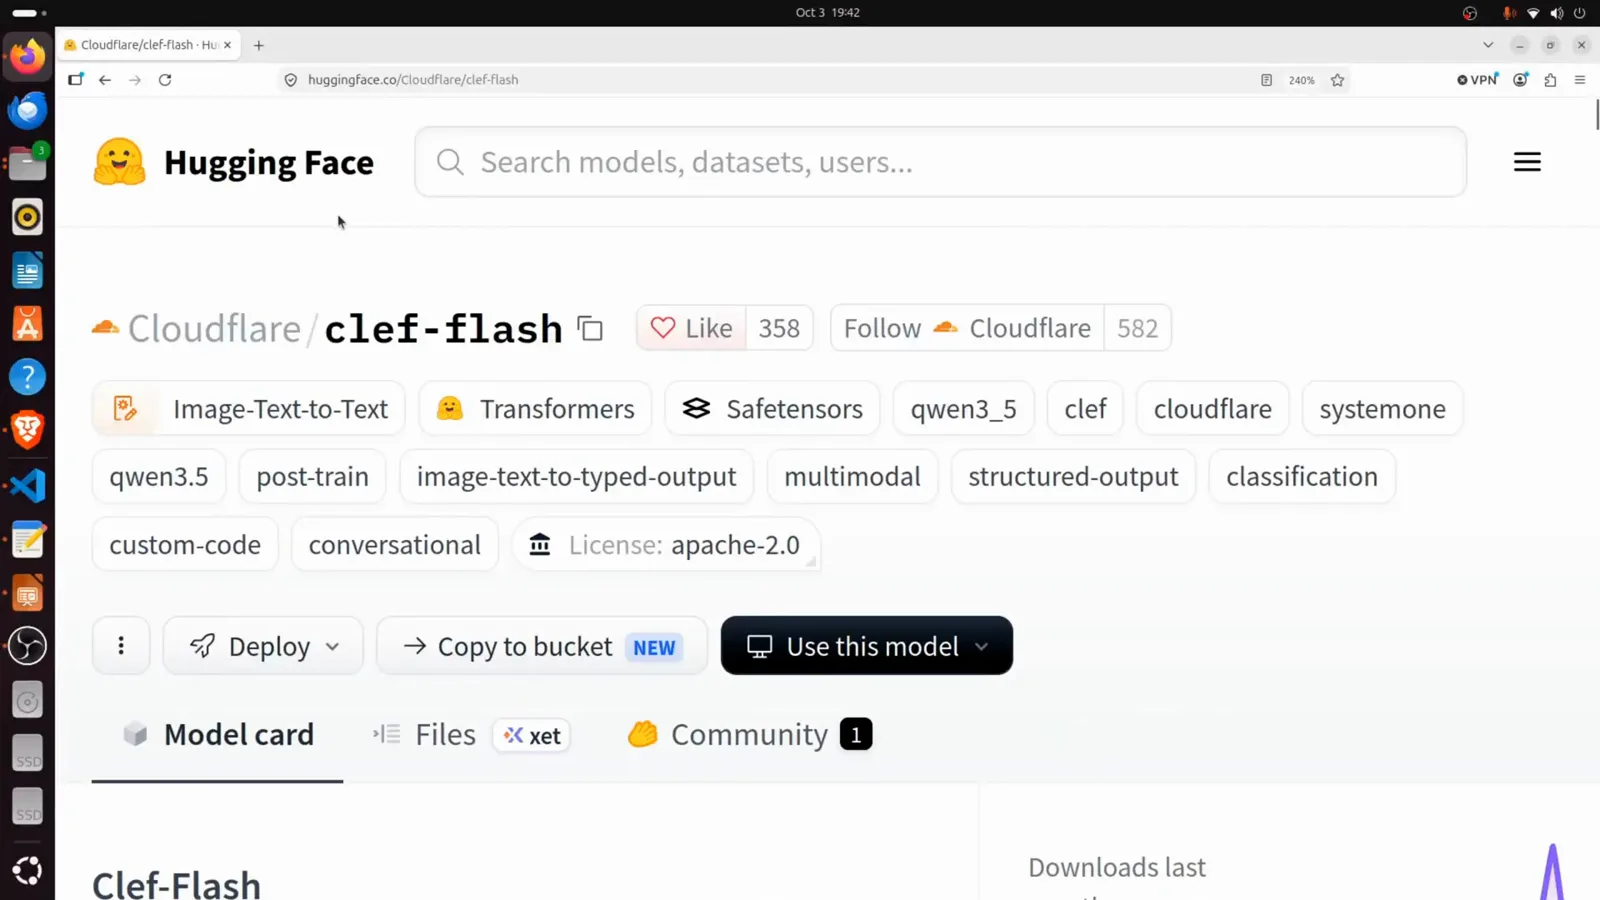
One repo has it all: Apache-2.0 weights, the systemone tags, and the test code the demos copy.Watch at 3:48 - 7
The official requirements: torch 2.11, transformers 5.10.2, pillow for images
The Usage section of the model card states its tested envelope in three lines: tested with torch 2.11 and transformers 5.10.2 on a single H200, and image and video inputs also need pillow. Below that sits the official snippet the whole video builds on: import sys and torch, pull the repo with snapshot_download("Cloudflare/clef-flash"), then sys.path.insert(0, path) and from joint_schema_model import collate_records, encode_record, load_release_model. That import is the detail worth pausing on — joint_schema_model is custom code shipped inside the repository, so the path trick is not optional: without sys.path.insert the module simply will not resolve. Versions move fast in this ecosystem; the versions on the card are what the video showed at recording, and pip will resolve whatever is current when you install.
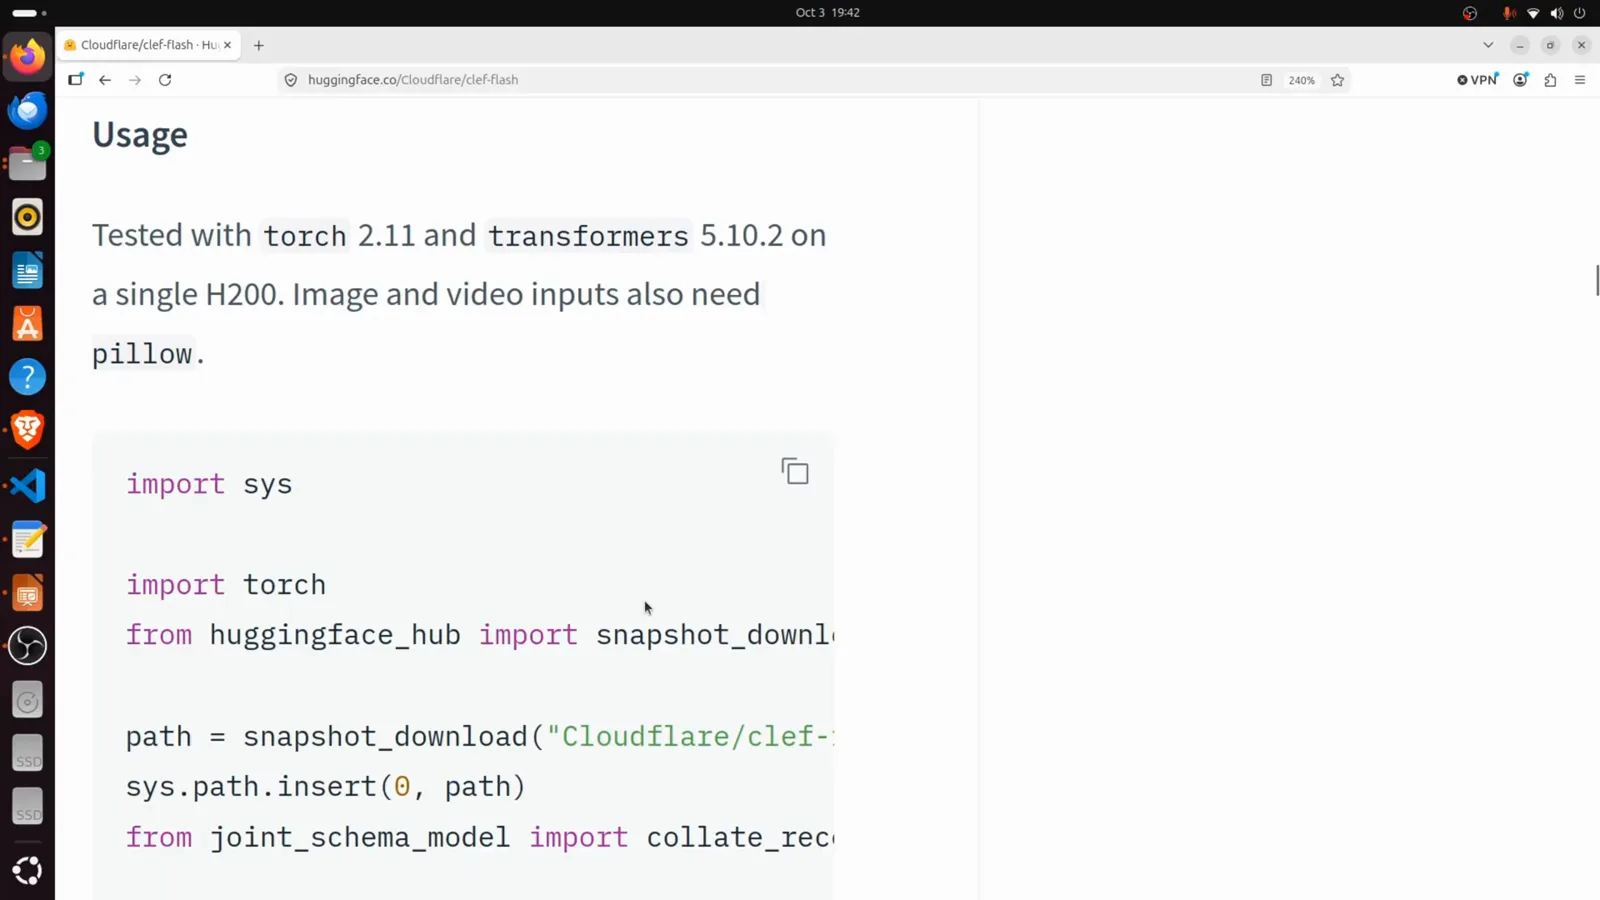
The card's own envelope: torch 2.11 + transformers 5.10.2 on one H200, pillow for image/video — plus the sys.path trick.Watch at 4:00 - 8
Ubuntu prep: apt, a testClef2 workspace, and the env1 venv
The terminal work starts the standard Ubuntu way: sudo apt update && sudo apt upgrade (type your password, be patient). Then the workspace: cd ~, mkdir testClef2, cd testClef2 — a fresh folder so the experiment stays contained. Inside it, python3 -m venv env1 creates the virtual environment (the demo runs Python 3.12), and source env1/bin/activate puts (env1) at the front of the prompt. With the environment active, the one install line that matters: pip install torch transformers accelerate pillow huggingface_hub torchvision. The creator flags this as the minimum set of libraries — and says outright that it took him a while to figure out the minimum configuration — with the total download around 2–3 GB, so let pip run. The visible install.txt on screen carries the same six packages plus the optional line covered in the next step.
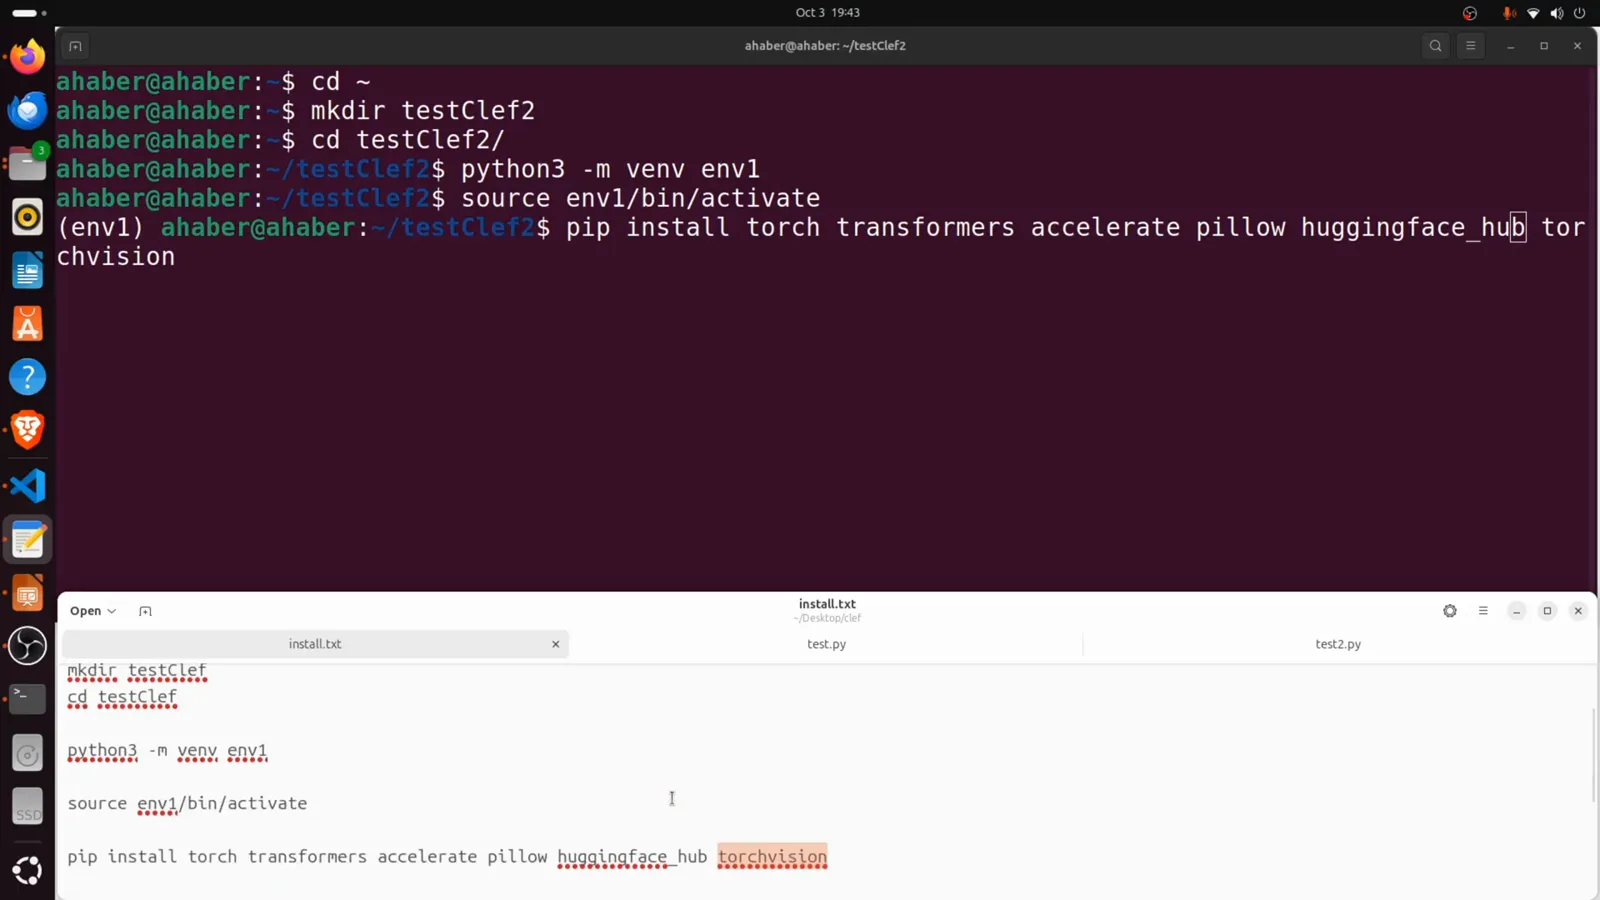
The whole environment in one frame: apt → testClef2 → env1 activated → the six-package pip minimum (~2–3 GB).Watch at 5:22 - 9
Optional speed-ups: causal-conv1d and flash-linear-attention
Two more libraries can speed up model execution and inference — and the video is careful about their status: they are not required to run the model. The advice is explicit: first try running the model with the six base packages, and only then see if you can install these two. The reason is the toolchain: pip install causal-conv1d flash-linear-attention needs the NVIDIA CUDA toolkit and the GCC compiler on the system, because on a first install the wheels compile locally and that can take a while (the creator's run was already cached, so his finished fast). When the on-screen run completed it read: Successfully installed causal-conv1d-1.7.0 einops-0.8.2 fla-core-0.5.2 flash-linear-attention-0.5.2 ninja-1.13.2 — with flash-linear-attention pulling in fla-core and requiring transformers 4.45 or newer. Those versions are the recording's, not a contract; treat them as a snapshot.
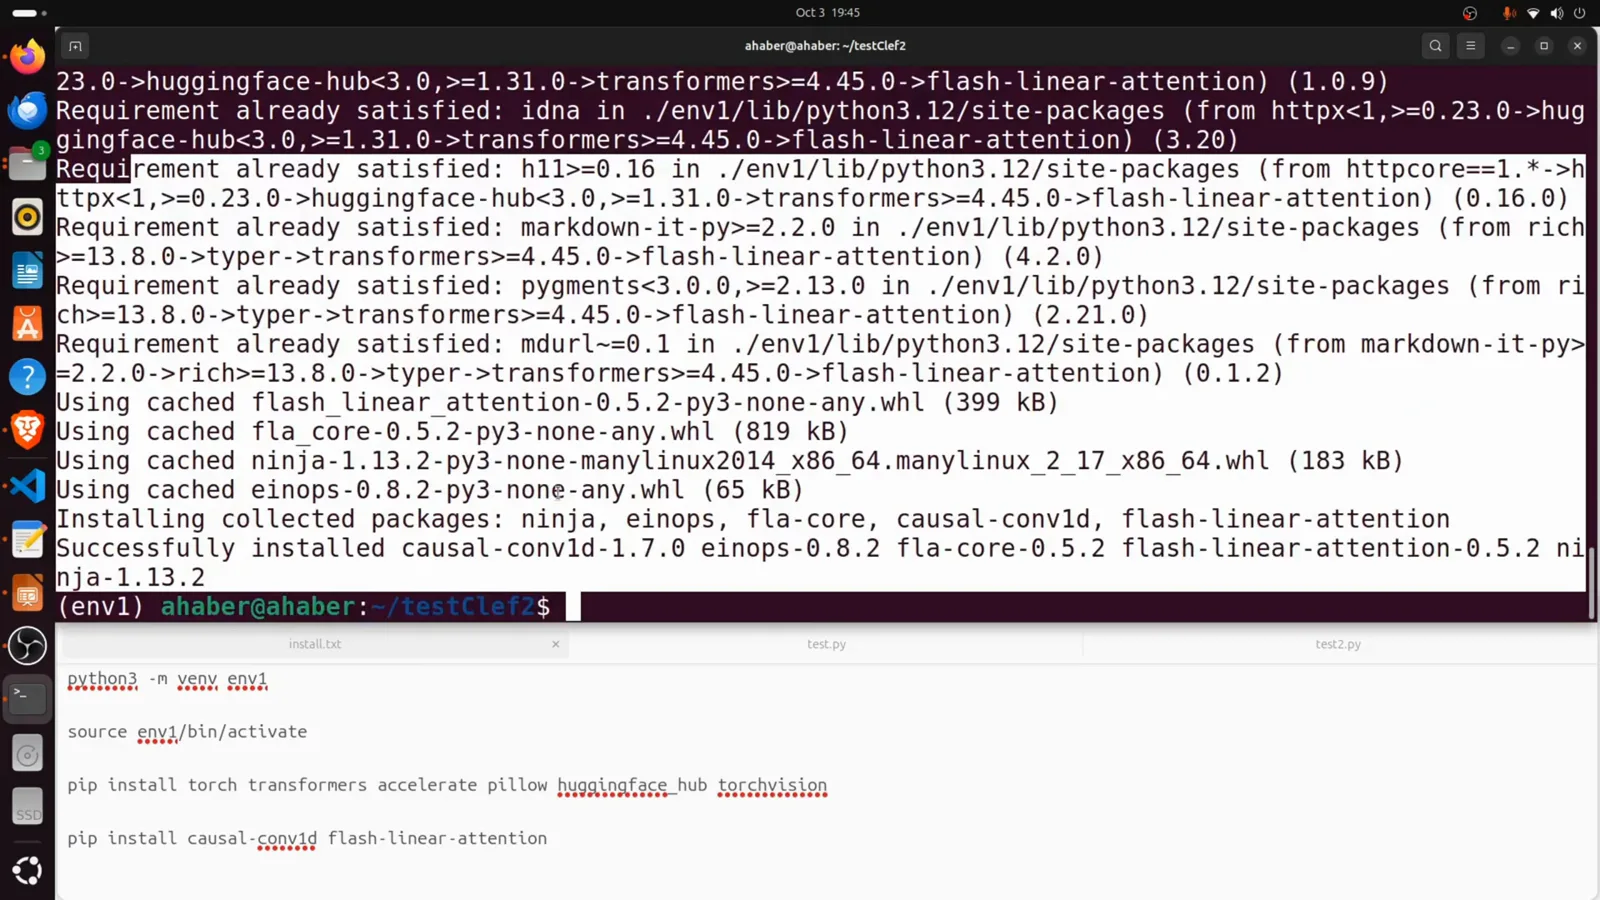
Optional, compiled, and clearly labeled: causal-conv1d 1.7.0 + flash-linear-attention 0.5.2 — after the bare install works.Watch at 6:22 - 10
First run: the invoice demo — overdue at 0.9728
test1.py is the purely textual example, and its record shows the anatomy of a Clef decision. The state is a small dict: an invoice with vendor Acme, total 1250.0, currency USD, status overdue. The questions: a "status" question of type choice — "What is the invoice status?" — with criteria paid ("Invoice is paid."), overdue ("Invoice is past due."), and draft (not sent); plus a "large" question of type noul — the yes/no primitive — asking "Is the total above 1000 USD?". After snapshot_download resolves the repo, the run fetches 17 files, prints Reconstruction complete, loads 760/760 weights in about two seconds (cached), and answers: status {'draft': 0.00969, 'overdue': 0.97277, 'paid': 0.01754} and large {'true': 0.97344, 'false': 0.02656}. Both verdicts are correct — the invoice is past due, and 1250 is above 1000 — and note the whole script is 1,179 bytes on disk.
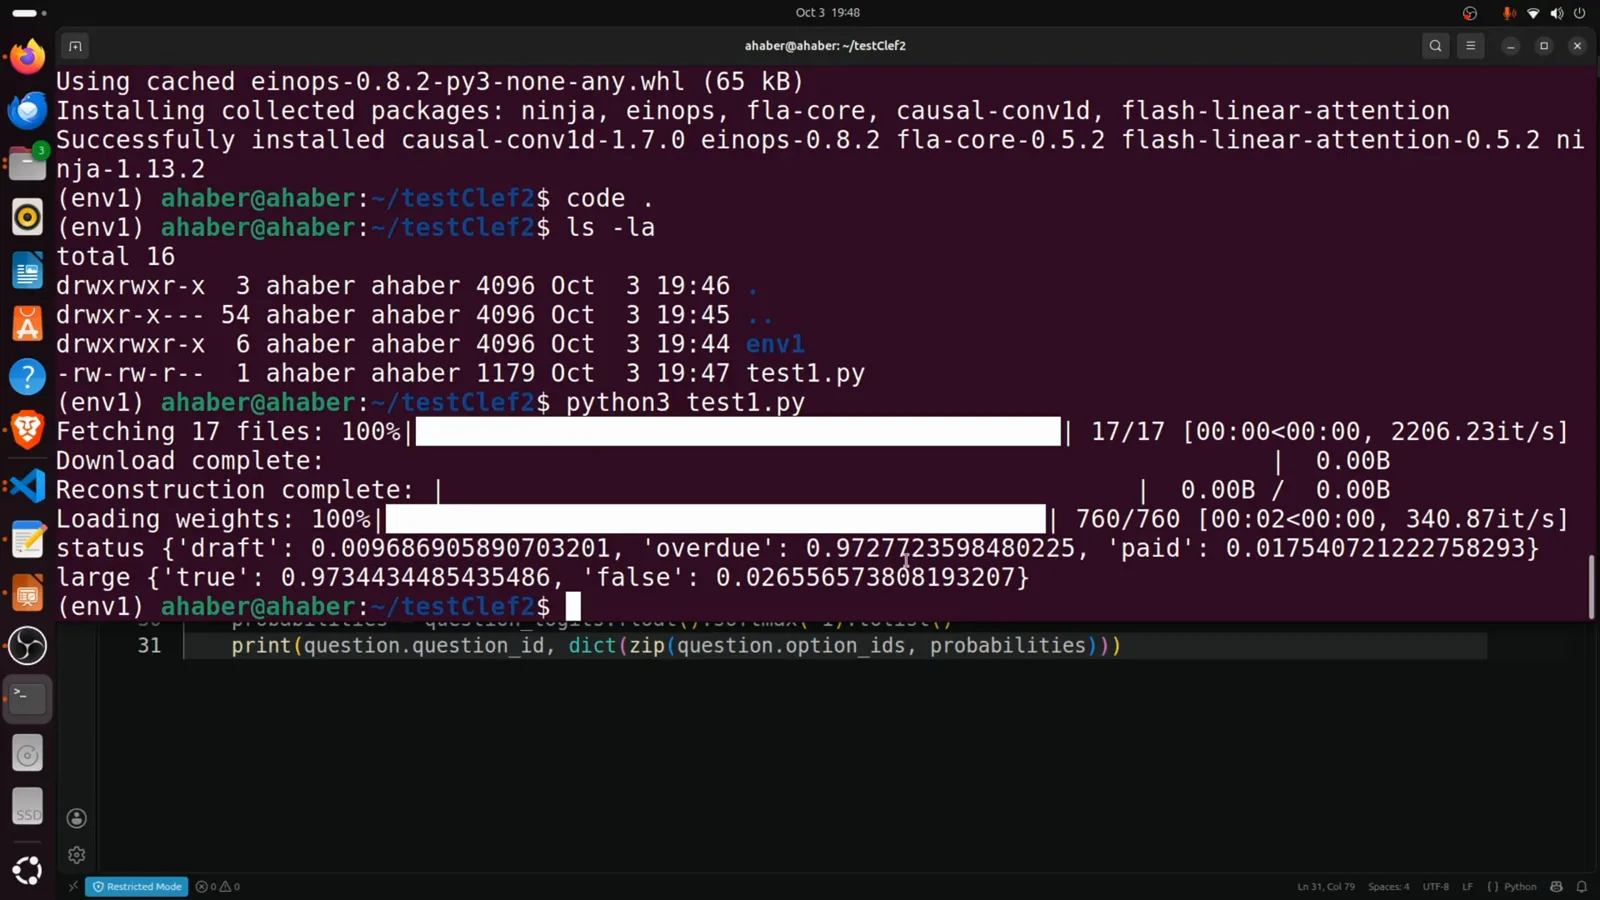
Text in, numbers out: overdue 0.9728 (draft 0.0097, paid 0.0175) and "above 1000 USD?" true at 0.9734.Watch at 8:42 - 11
The image demo script: one record, one photo, two questions
test2.py is where the multimodal axis becomes real, and the frame shows the whole recipe. Imports gain one line — from PIL import Image — then the same scaffolding: snapshot_download("Cloudflare/clef-flash"), sys.path.insert(0, path), and from joint_schema_model import load_release_model, systemone. A comment above the load call says what to expect: load the 9B model natively, it fits in 24 GB VRAM on an RTX 3090. The record itself: "model": "clef-flash" — the comment marks it as required by the systemone API — a text state ("Analyze the condition of the smartphone and its packaging."), the image list [Image.open("test_image.jpeg")], and two questions: device_damage of type choice ("Inspect the smartphone screen for damage." with none = Perfect condition, scratched = Minor scratches, cracked = Screen is broken) and has_packing_materials of type noul ("Is there paper or bubble wrap in the box?"). The video even shows the failure mode of forgetting the model key: ValueError: model and state are required.
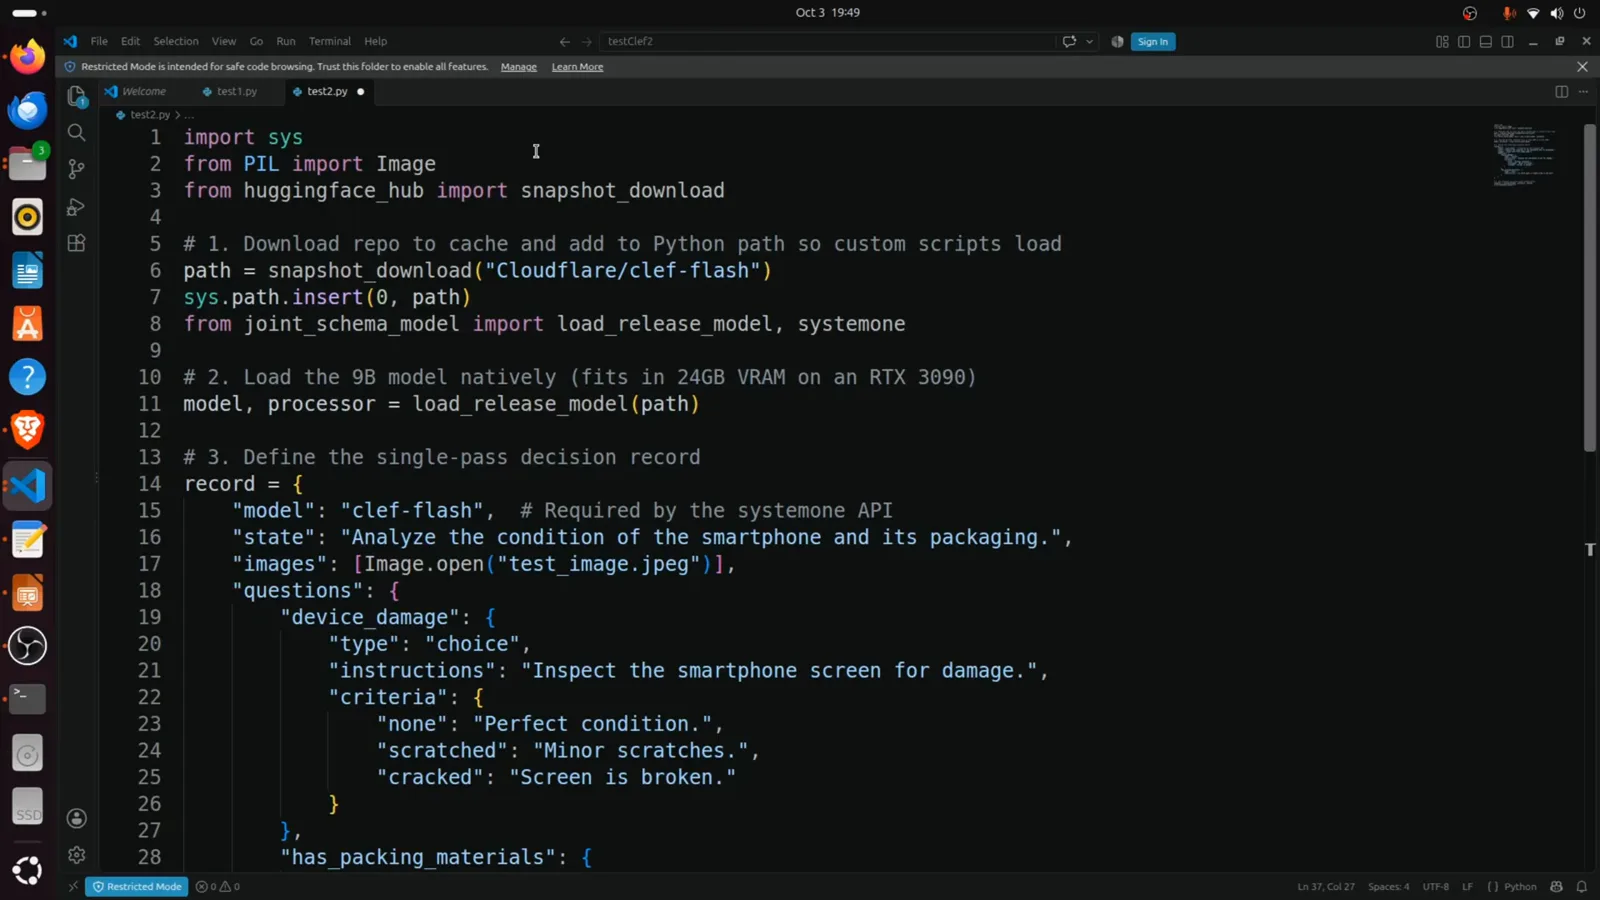
The multimodal record in full: model key required, photo in images[], one choice question, one noul.Watch at 9:42 - 12
The multimodal verdict: cracked 0.9626, packing paper yes 0.957
The final run ties both demos together in one terminal. Above it, test1's verdicts are still visible; below, python3 test2.py fetches the same 17 cached files, reloads the 760/760 weights, and prints: {'device_damage': {'type': 'choice', 'choice': 'cracked', 'confidence': 0.9626, 'probabilities': {'none': 0.015, 'scratched': 0.0225, 'cracked': 0.9626}}, 'has_packing_materials': {'type': 'noul', 'noul': 0.957}}. Read it against the photo from step three: the screen is in fact broken and cracked wins at 96%, with the full distribution across all three criteria returned, not just the winner; and the crumpled paper is in fact in the box, which the noul check backs at 0.957. The inference itself runs only after the weights load — probability calculation, as the narration puts it, is very fast once loaded. Keep the honest frame: one generated photo, one run, on the creator's hardware — it proves the pipeline works end to end, and nothing more.
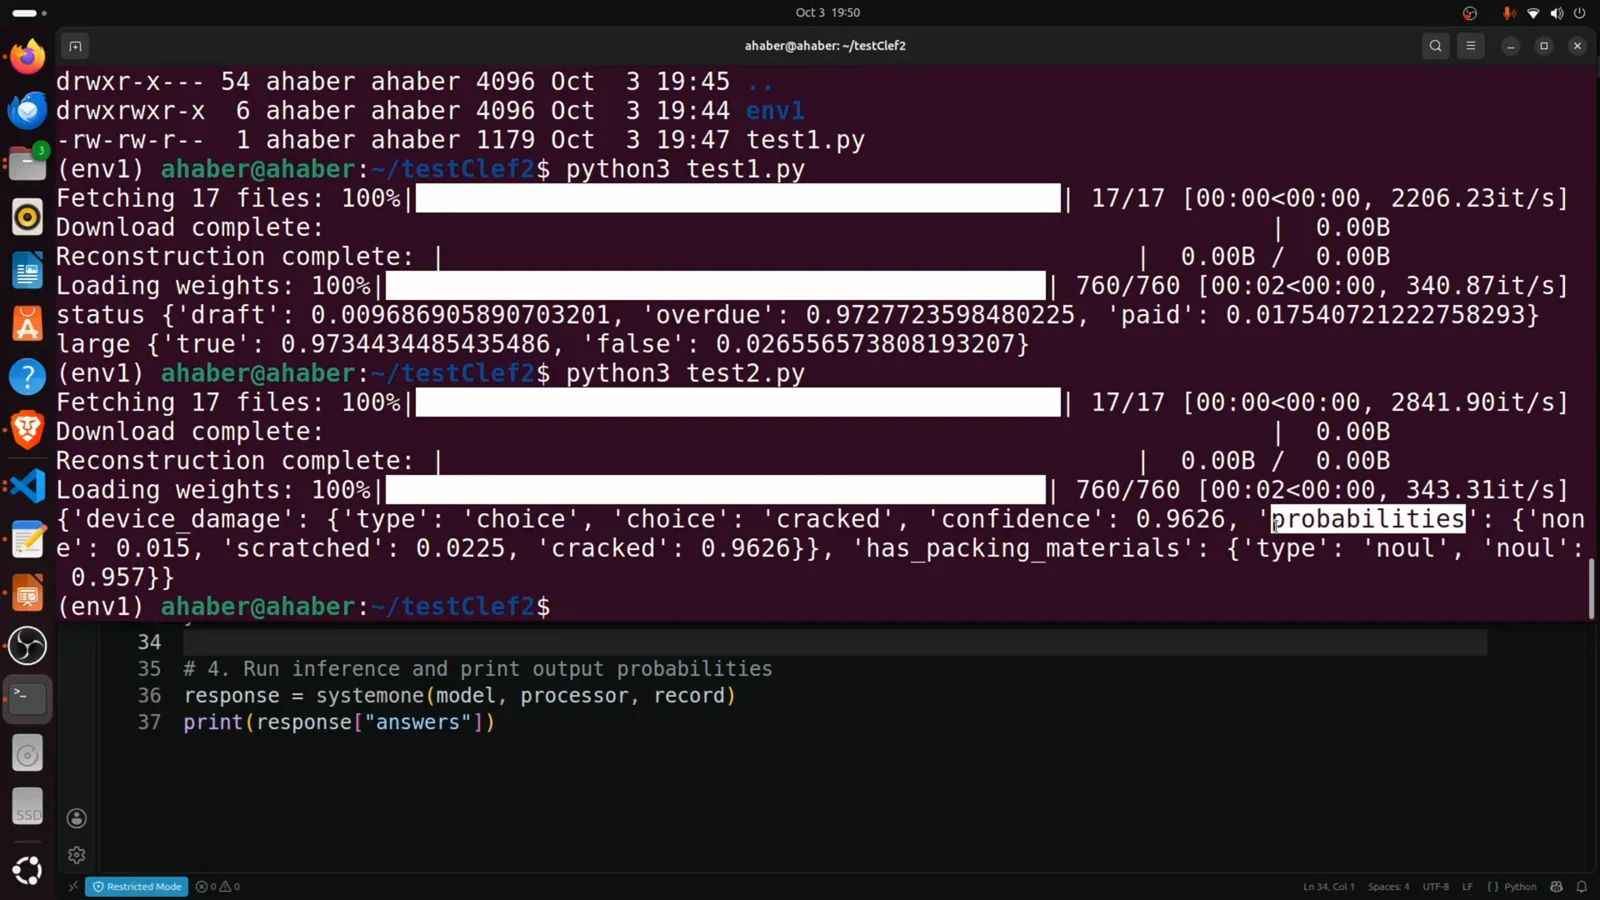
Both demos in one screen: cracked 0.9626 with the full distribution, packing-paper yes at 0.957.Watch at 11:02
Frequently asked questions
How do I install Clef-Flash?
On Ubuntu, five commands take you from zero to the model: sudo apt update && sudo apt upgrade; mkdir testClef2 && cd testClef2; python3 -m venv env1 && source env1/bin/activate; pip install torch transformers accelerate pillow huggingface_hub torchvision (the minimum set, roughly 2–3 GB); and in Python, snapshot_download("Cloudflare/clef-flash") with sys.path.insert(0, path) so the repo's own joint_schema_model module imports. Optionally add pip install causal-conv1d flash-linear-attention for faster inference — but run the model on the base set first.
What are the requirements to run Clef locally?
A Linux box with an NVIDIA GPU: the demo machine was an RTX 3090 running Ubuntu with Python 3.12, and the code comment targets 24 GB VRAM for the native 9B load. Per the model card shown in the video, the stack was tested with torch 2.11 and transformers 5.10.2 on a single H200, and image or video inputs additionally need pillow. Budget about 2–3 GB for the six-package pip minimum, plus disk for the downloaded repo (17 files fetched on first run). The optional causal-conv1d and flash-linear-attention wheels need the CUDA toolkit and GCC because they compile on first install.
How much VRAM does Clef-Flash use?
About 18.7 GB for the process in the video's nvtop view: during a test2.py run on the RTX 3090, python3 held 18,666 MiB and total card usage read 20.198 of 24.000 GiB at 62°C; when the run finished, usage fell back to roughly 2 GiB. The demo code states the design envelope in one line — the 9B model loads natively and fits in 24 GB VRAM on an RTX 3090 — so a 24 GB NVIDIA card is the honest minimum for full precision. All figures are from the creator's machine at recording; measure on your own card.
Can Clef-Flash really take images as input?
Yes — that is what makes it multimodal, and it is shown end to end in the video: the record carries images: [Image.open("test_image.jpeg")] next to the text state, with pillow installed for image (and video) inputs. In the demo, a photo of a cracked-screen phone in a paper-packed box produced device_damage cracked at 0.9626 with the full per-option distribution, and has_packing_materials (noul, yes/no) at 0.957 — matching the crumpled paper visible in the photo. This image-input capability is a genuine Clef feature with no equivalent in the local Jev stacks this site covers. One photo in one demo proves the plumbing works, not benchmark accuracy.
Are causal-conv1d and flash-linear-attention worth installing?
They are optional speed-ups, and the video's advice is to earn them: get the model running on the six base packages first, then add pip install causal-conv1d flash-linear-attention. The cost is a real toolchain — the NVIDIA CUDA toolkit and GCC must be present because the wheels compile locally on first install, which can take a while (versions at recording: causal-conv1d 1.7.0, flash-linear-attention 0.5.2, which pulls fla-core and needs transformers 4.45+). If your workload already meets its latency budget on the base stack, the extra compile time buys you nothing on day one.
Is Clef the same as Jev?
No. Clef is Cloudflare's decision-model family — Clef-Flash being the 9B, Apache-2.0, multimodal member — while Jev is the typed-decision product this site documents; a shared category does not transfer benchmarks, accuracy, or install paths. Both return per-option probabilities over typed questions, but Clef-Flash adds raw image input on a 24 GB-class GPU, and the local quantization story differs too: our Clef-vs-Jev page tested a Q4_K_M build in Ollama and found the joint schema head absent from the quantized file — a reason this page's full-precision, transformers-native install is the different route. Evaluate both on your own workload before shipping either.
Related guides
Clef-Flash vs Jev, Tested Locally in Ollama (Q4_K_M)
The same model on the comparison axis: a Q4_K_M quantization in Ollama on an 8 GB laptop, with the missing joint schema head finding — this page is the from-zero, full-precision install tutorial instead.
ReadJev vs Clef: the Official-Benchmark Recipe
Cloudflare's hosted evaluation numbers for Clef-Flash against Jev, both vendors' figures labeled — the selection view this install guide deliberately stays out of.
ReadNox 4B Hands-On: the Decision 2.0 Family
Four scenario tests of the vLLM-router family's 4B pick; its warning card about causal-conv1d and flash-linear-attention fallbacks is the same optional-libraries trade this page walks through.
ReadCLM-8B: How a Decision Model Is Trained
The architecture deep-dive sibling: hard negatives, frozen backbones, and the training recipe behind a model that, like Clef-Flash, returns per-option probabilities instead of text.
ReadRun Jev Locally: the Official Local Setup
The same install-and-run job for the official product — different brand, different runtime, no image input; compare the two install routes before committing hardware.
ReadSelf-Hosted Jev: the Overview
Where a local Clef-Flash install fits in the self-hosting landscape, and what you take on when the decision model runs on your own GPU.
ReadMore video walkthroughs
- Jev Classification Quickstart: OpenRouter API, Primitives & Real Probabilities
- Jev Architecture Explained: Why 70ms Decision Models Beat LLMs for Workflow Automation
- Ultra-Fast Browser Agents with Jev: 178ms DOM Loops & Dual Model Orchestration
- Open Jev Models Are Here: Semif, Nimble, Decider, DiffusionGemma & Laya Hands-On
- Jev vs LLM: Will Jev Replace LLMs? Krish Naik's Whiteboard Explainer
- Jev Trader Tutorial: Build a Subsecond AI Trading Bot on Monad
- Jev Model Router: Build a Privacy-Gated LLM Router with Jev & OpenJev
- Jev Tutorial for Beginners: State, Questions & the TypeScript SDK
- Run Jev Locally: Kev, SemIf & Von on Your Own GPU (OpenJev Guide)
- Jev RAG Reranker: Policy-Steered Reranking for Retrieval-Augmented Generation
- When to Use Jev: An Engineer's Audit of Claims, Gates, and Failure Modes
- LangChain + Jev Integration Tutorial: Routing, Guardrails & Evals
- Jev MCP Server: Connect Jev Decisions to Claude Code & Cursor
- Jev vs Luna: Independent Benchmarks Put "Better, Faster, Cheaper" to the Test
- Jev Agent Harness: Where the Decision Gate Sits in Your LLM Loop
- Jev Playground Walkthrough: The Hotdog Lesson, Criteria, and a Four-Console Token Test
- Jev Text Classification API: Zero-Shot CLI & REST with classifier.dev
- Jev API Examples: First Request, curl & All Three Question Types
- Jev Log Triage with Expanso Edge
- Jev Lead Enrichment with Treg: ICP and Signup Scoring
- Use Jev Decision Nodes in Heym for Model Routing
- Laya Tutorial: Open-Source AI Routing With Calibrated Probabilities (Laya vs Jev Setup)
- Train Your Own Jev: Fine-Tune a Jev-Style Decision Model for $5–$17 (What You Can and Cannot Train)
- Jev Tips: 8 Best Practices for Better Decisions (State, Questions, Criteria & Thresholds)
- Jev Context Compaction: Prune AI Agent Memory Without Generative Summaries
- Jev as an LLM Judge: Confidence-Gated Cascades at 0.36% of the Cost
- TypeSafe Computer Use: Local Desktop Automation with Jev, Step by Step
- Jev Resume Screening: Build an AI Resume Evaluator with the Jev JavaScript SDK
- Jev + Claude Code Guide: Voice-Controlled Browser Automation with Typed Decisions
- Jev + Codex: Install the TypeSafe Skill and Triage a Real Gmail Inbox
- Jev vs Ollama: Can Local AI Replace Hosted Jev Without Sending Your Data Away?
- Build Your Own Jev: Train a Free Open-Source Zero-Shot Classifier (That Plays Doom)
- CUA-S1-Forms: a 706K-Parameter Jev-Like Model That Fills GUI Forms on Your CPU
- NOC/SOC Alert Triage with Jev: Rules First, One Typed Question, a Policy Gate
- Ollama Decision Models: Run tev1 and Nimble Locally (Tested on an 8 GB Card)
- Jev Guardrails in Production: A Five-Step Playbook for Decision Automation
- A Session Drift Guard for Pi Agent: Let the Jev Model Propose, Let Code Decide
- 50 Tev1 Use Cases: What a Local Decision Model Can Actually Do (Tested on an 8 GB Laptop)
- Jev, Hands-On: Where the Official Claims Meet Independent Remeasurement
- Jev Ticket Classification in a Real App: the After-Insert Hook and the Calculated Field
- OpenJev RLCD: Run the Open-Source Calibrated Decision Model Locally (Full Guide)
- Clef-Flash vs Jev: I Tested Cloudflare's Decision Model Locally in Ollama (Q4_K_M)
- CLM-8B: the Contrastive Decision Model That Scores 1,024 Options in 44 ms (13x Faster Than Jev)
- Nox 4B Tutorial: Run the Decision 2.0 Model Locally and Put It Through Four Real Decisions (One Ends in a Fail)
- Julia-1 Tutorial: Install the Open-Source Jev Replacement in Pure Python (and Watch It Beat If-Statements 9 to 2)
- OpenJev 0.8B on CPU: I Built a Ticket-Routing Inbox and Calibrated the Thresholds
- Jev n8n Integration: the JevGate Community Node, Step by Step (Plus a Plain-HTTP Fallback)